Today I went to Oceanside Museum of Art and took a class from Jane LaFazio to learn how to carve my own rubber stamp. It was a great class…but before we get to that…I got there an hour early…
And there was an art show in the streets!
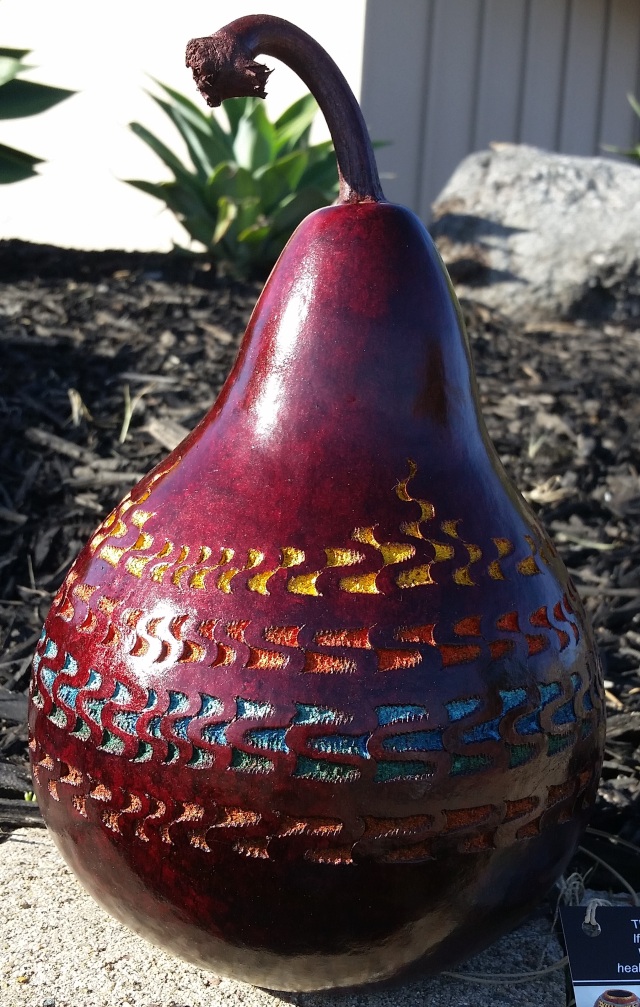
So I got to browse around and found one of my favorite artists, Grace Swanson (GourdsByGrace.com). I bought a beautiful gourd from her last year that incorporated a dyed pine needle trim and woven antique silk kimono material. Today I found two new pieces I just HAD to have (I went back to her booth after class for a beaded gourd I had seen earlier, but got stars in my eyes over these two beauties and there was no going back).

She often scoops out her gourds (and sometimes appliques cool textures inside) but this one is left whole so the seeds inside shake around a little (I like that :).
Then there’s this piece of magic…


I was so glad to get the chance to see her work again and chat with her about her materials and process (she also does spectacular pine coiling and she uses Montezuma pine needles from Texas – we talked about the differences between those and the Torrey Pine needles in my neighborhood). Getting to add to my “Gourds by Grace” collection was icing on today’s cake.
And Now, Some Rubber Stamps
The class with Jane LaFazio was everything I hoped for and more. I spoke with someone who is taking one of her online courses as well and they come highly recommended. I got to see this gal’s art journal from the class (water colors and sketching) – so elegant and exactly the kind of skill I’d like to learn. I’m sure I’ll be signing up for the next one of those.
So we started with something called a “gum eraser” to get some practice and create something small.

I borrowed the carving tools from the museum but I’m definitely going to invest in my own set because this is a fun and easy way to make amazing reusable patterns. In the class we talked about making Christmas cards, printing tote bags, combining these patterns with watercolor painting – the possibilities are endless. Some people made a printed envelope in class with some brown paper, and the teacher showed an example that she stamped, scanned and printed on vellum. So many options!!

So the bottom right design is my first print test after cutting out the seahorse (I kind of like the black background). Then I went through a series of trimming and printing to get at the effect I was after.


What a fun day and an interesting class. The materials for this are not too expensive (cutting tool, some rubber pads and ink) and the results are really fun to play with (I haven’t even started to play with coloring in my designs with pencils and water colors). I saw some really artistic renderings today from folks who have some experiences with these stamps. We also learned ways to repeat patterns and create mosaic type designs. This might play a role in this year’s Christmas cards…

Those gourds! I can’t even … ❤ ❤ And your seahorse came out really well. Great job! 😀
LikeLiked by 1 person
Thanks Paardje!
LikeLiked by 1 person
Thank you Paardje! The gourds really inspire me (my neighbors are now delivering pine needles to my front door step…oh dear, how can one keep up?). Grace really inspires me to create new things.
LikeLiked by 1 person
These look great!
LikeLiked by 1 person
so beautiful!
LikeLiked by 1 person