Crochet Beaded Bracelets

My friend Gina sent me a link about two years ago showing some crocheted bracelets with button closures – so cute! I figured out the pattern, found different sized buttons, crocheted about twenty bracelets in varying lengths (multi-wraps are fun!), used jewelry o-rings to attach charms midway and started handing them out to friends on my travels.

Oh, the charms – they fell off in legions – usually after a household chore like doing the dishes…or walking across a room. Sometimes even before I was done with the visit (In Kauai I actually asked for some pliers and replaced the gifted charm with one from my purse. It probably also fell off soon after I left. Mrgh!)

I have not mastered the fool-proof closure of o-rings (does this exist, beyond soldering?).

Alas, a design failure the internet did not prepare me for. Also, I’m not sure how much I want to talk about how hard it is to BUTTON your own wrap-around bracelet…

New rule: Jewelry should not be a reminder of loneliness, or dexterity challenges, or a cause of any stress whatsoever frankly (right?!). Wait ’til you see how I’ve solved this!!! (P.S. o-rings replaced by stitching…why didn’t I think of that…first?!)

Magical Magnet Closures

I attended a presentation today of the San Diego Bead Society and was inspired to think again about what kinds of trades I could make for my next art retreat. I put 2 + 2 + 2 together and came up with: crocheted bracelet with beads and magnetic closure.

20161008_165219crop
Size 11/0 beads, Lizbeth variegated thread, size 10, gold magnetic closure

A couple hours before this creation I spent time looking up patterns for beaded amulet pouches and such, thinking that would be my thing. Then I remembered what I already know how to do and how many supplies I already have on hand. And how time works.

So I made the above prototype, using waxed nylon bead string to attach the magnetic ends to the crocheted piece, and also to thread the beads throughout. For the crocheters, I used a 2.25mm needle on Lizbeth size 10 thread. So far I’ve mapped a small bracelet (I have skinny wrists) like this:

  • Chain 60
  • Work a slip stitch in the 2nd chain from hook, and in all the rest to the end
  • Gauge: I worked these stitches fairly loose, to make way for the beads.

After that, I stitched the waxed bead string through a bead on one end and then worked a series of knots before attaching the magnet closure. Then I used the same waxed string to work my way back through the bracelet, attaching the beads on alternating sides.

20161008_165207crop

I aimed for every other stitch back and forth and it didn’t seem to need too much precision to attain a good effect.

I tried a couple of beading patterns (e.g. all on one side vs. alternating) and decided that going back and forth on the chain gave the best dynamic effect on the wrist.

20161008_165555crop

20161008_165555

I used Dritz Fray Check on the end knots and wrapped the ends next to the magnetic closures with extra stitches. We’ll see how it holds up in the next few weeks.

The Front and the Back


So far it’s hanging nicely with beads on all sides and the magnetic catch falling to the bottom of my wrist. I’ll keep wearing it and see how it holds up throughout the week.

Favorite Discovery

Magnetic connectors do the work for you! And they come in really fun shapes – like fish and turtles. The ones I found were too wide to work with my current skinny crochet chains but I have plans for those magnetic turtle and fish connectors…just you wait…


Bringing It All Together: I’m Making Cards!

I had to wait awhile to post pictures of this so my daughter wouldn’t see her birthday card ahead of time. I’m having a lot of fun using my mono prints and stamps to make impromptu cards (anyone else out there boycotting purchased greeting cards and all they stand for? UNITE!).

So here’s what I made to celebrate my daughter’s offspringing…

638cover
I added beads to the embroidery then used double-sided tape to attach it to a piece of scrapbooking paper.
20160614_174855
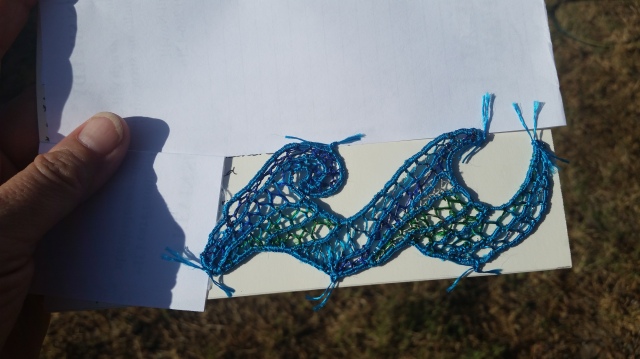
Then I glued a mono-printed page to the inside top and stitched my needle lace to the bottom (I like how the cut threads added to the wave motion).
20160527_150704
close-up of the mono print
20160614_174845
close-up of the attached needle lace
20160527_150720
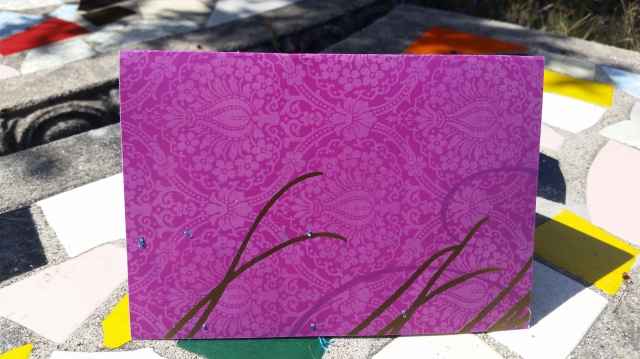
Back of the card – I like how the blue silk stitches seem to interact with the gold grassy marks.

I really enjoyed adding beads to my embroidered patterns and I suspect that technique might make another appearance. I especially enjoyed finding a use for my needle lace pattern AND avoiding the greeting card industry. It’s evil y’all. Buy card stock on sale and draw a picture. Your loved ones will love it even more than that $7 card that sings.

P.S. I used my mono prints recently to create a thank you card (plus two bonus bookmarks I included…that could be used to create two new cards…). It’s the gift that keeps on giving, as well as a gift that’s fun to give. I highly recommend purchasing a cheap gelli-plate and going to town. It’s kind of a “no wrong answers” situation: even your least favorite print can be turned into your favorite bookmark.

Embroidering My Stamps on Cloth

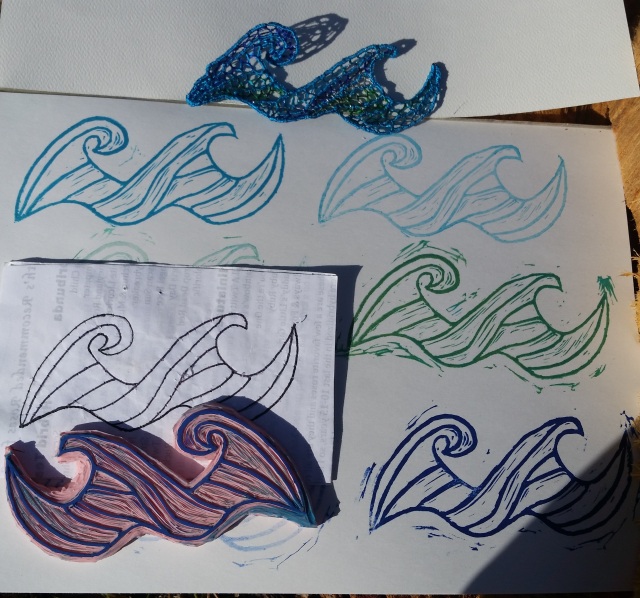
I’ve been having a lot of fun carving my own stamps since my class with Jane LaFazio. I decided to make a stamp from the wave pattern I used for my last needle lace design. I’m thrilled with the results.

The carved stamp is on top of the needle lace pattern it came from. Ink stamps and needle lace results surround.
The carved stamp is on top of the needle lace pattern it came from (you can see the needle holes if you look closely). Ink stamps and needle lace results surround.

I’m digging the rubber stamp carved “chatter” inside the waves – I tried to let this flow while I was carving instead of doing a full excavation. (There were so many unintended puns in there that my fingers got sparked off the keyboard for a second. Unintended y’all, I promise.)

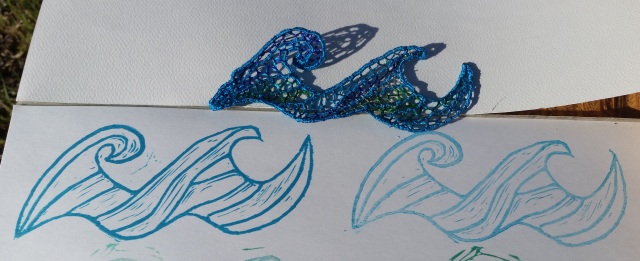
Close-up on the wave needle lace. I love the shadows at the top of the waves. I was really going for motion with the different thread choices.
Close-up on the wave needle lace. I love the shadows at the top of the waves. They add to the motion of the ocean (couldn’t resist – I’ll try to stop).

I especially like seeing the end products next to the pattern. So different when it’s transferred to ink on page vs. needle laced. If you’re digging that, wait til you see what’s next!

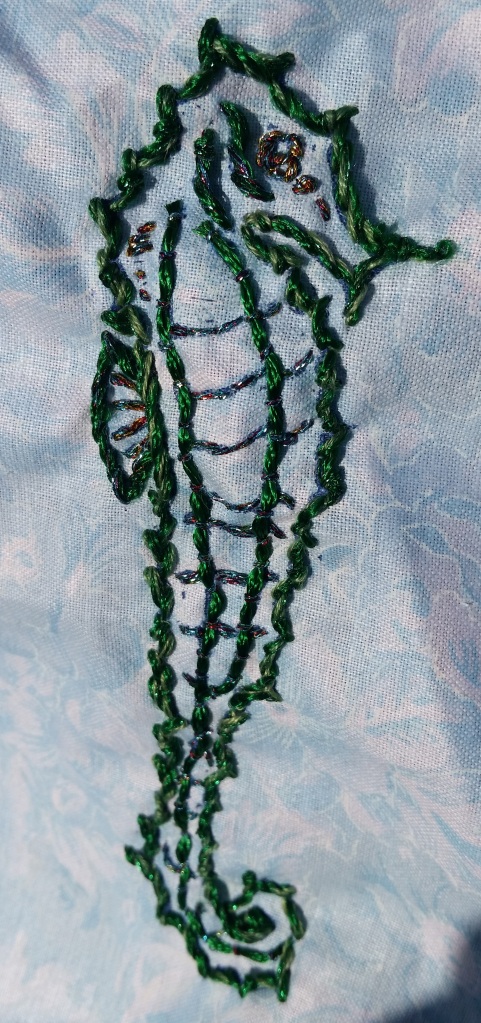
This is my first embroidered stamped pattern...I learned a lot.
This is my first embroidered stamped pattern…I learned a lot.
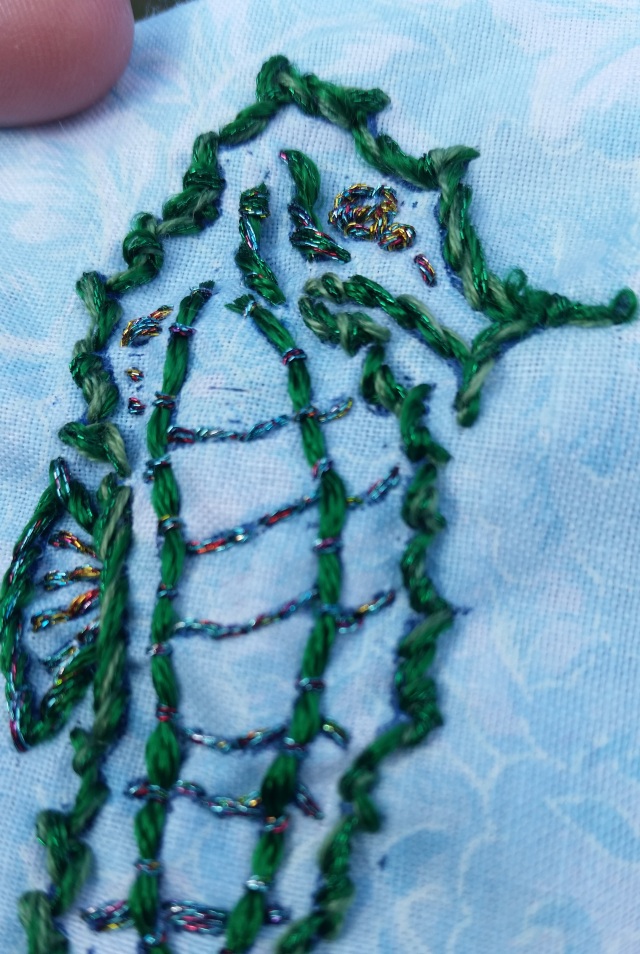
close-up on the shiny thread...and spooky eye
close-up on the shiny thread…and spooky eye

So I really like metallic and silk thread…and they’re very finicky. I think Seahorse Dude is kind of gnarly as a result, which makes sense when you think about his time underwater in the ocean…moving on…

WIP
WIP – loving the direction of the daisy chain stitches
Finished product - yay metallic thread!
Finished product – yay metallic thread!
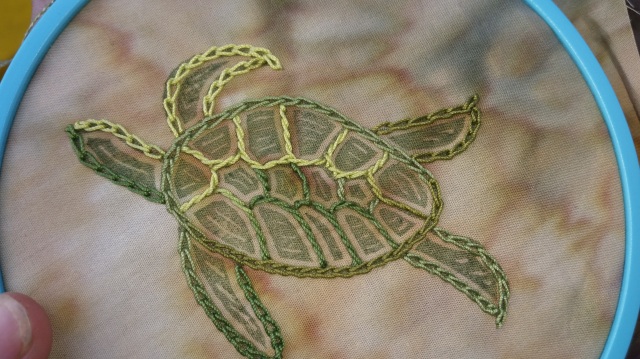
Turtle gets a close-up...he's on the move!
Turtle gets a close-up…he’s on the move!

Earlier today…I was getting a smog-check on my car next to a craft store…so I spent my time wisely.

Super cool frame idea (way too much $$ for purchase...even with a coupon)
Super cool frame idea (way too much $$ for purchase…even with a coupon)
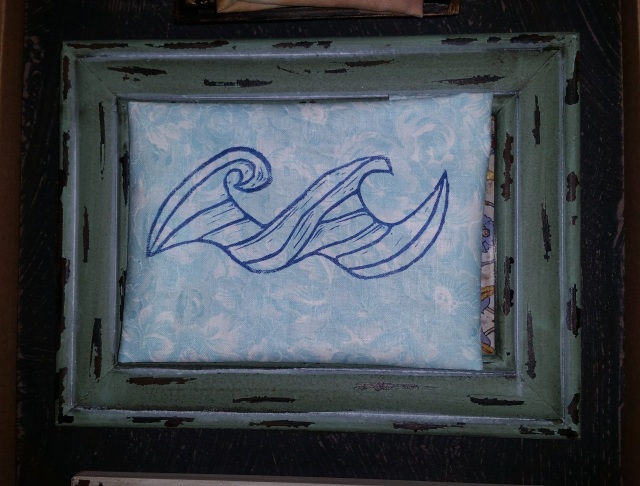
And a close-up on our favorite wave (pre-embroidery!)
And a close-up on our favorite wave (pre-embroidery and in a borrowed frame!)

It’s fun to see my rubber stamp patterns come to life in stitching!

Crafting/Sailing Away…

Art Quilting: In Progress

This weekend I took another wonderful class with Jane LaFazio and I’m having a great time finishing my small art quilt. Following Jane’s suggestion I took this opportunity to commemorate a fun trip in an art quilt. My family was fortunate enough to visit Turkey a few years ago and I *just almost* finished the scrapbook from the trip. So I raided the box of leftover souvenirs and I’m creating this art quilt as a final homage and memory creation of that travel experience.

Jane taught us how to incorporate paper and cloth into our base quilt, then we began embellishing each quilt square in anticipation of putting them back together again. Here’s a few shots of my WIP…(I’ve wondered more than once how this will all come together, but I’m seeing it now and getting more and more excited with each finished square and re-working of the pattern).

We'll start with squares I think are close to finished
We’ll start with squares I think are close to finished. I captured the city of Foca in this map segment because it was a favorite for us. The beads are from a bracelet we found on the street there.


20160501_163045
Museum ticket, beads, cloth, various threads (the first name of our guide appears in this quilt block “Marina” – her last name is on another block.) First I tried a new zig-zag stitch across the bottom in crewel yarn that I didn’t really like so I wound up the thread with the stem and outline stitch around the feather (better)…then worked up the beads with some metallic thread (they’re cool – turquoise inside and copper around the edges)…and wound up back on the weird zig-zag stitch with more beads. I think it comes together pretty well…it took some time though…


The paper at the top of this quilt square is from a bag of nuts we bought at a wonderful store on the coast of Turkey. A whole store dedicated to dried fruits and nuts - so yummy!
The paper at the top of this quilt square is from a bag of nuts we bought at a wonderful store on the coast of Turkey. A whole store dedicated to dried fruits and nuts – so yummy! More embellishment is probably in store for that bottom piece of material…we shall see what happens after I attach everything. This piece of paper makes me very happy in this quilt. It might get center billing…


We have another patch of blue here that may or may not get further embellishment. I enjoyed bringing the scroll pattern down into the green on this one, and the red thread is a variegated gift from a class member - so it needed to jump on board. :)
We have another patch of blue here that may or may not get further embellishment (it doesn’t show in the picture but the material is silk with blue on one side and pink on the other – the sheen is amazing). I enjoyed bringing the scroll pattern down into the green on this one, and the red thread around the “Turqui” logo is a variegated gift from a class member – so it needed to jump on board. 🙂


Unfinished Business

I thought this one was done in class, but it's starting to look like it needs some more...
I thought this one was done in class, but it’s starting to look like it needs some more. (The Museum of Turkish and Islamic Arts was wonderful and highly recommended.)


Lots of options here...the bracelet is an example of Turkish crochet called "oya" that I bought there.
Lots of options here…the bracelet is an example of Turkish crochet called “oya” that I bought there.


Last quilt square that hasn't been finished. This is another oya piece I bought there - looks to me like it needs a little needlework closet to hang in...
Last quilt square that hasn’t been finished. This is another oya piece I bought there – looks to me like it needs a little needlework closet to hang in…

I’ll share finished product when I get there.

Making and crafting to my heart’s content and hoping the same for you…

Needle Lace: Waves

I’ve been working on a needle lace pattern I created to represent a set of waves and I really like how it turned out. I enjoy in-process pics so I’m posting a few.

How It Started

I stitched a few free-drawn leaf patterns first that I liked and didn’t like (yes on silk thread outline, no on structural veins that don’t connect because lace loses its shape).

So then I tried this wave pattern sketch of mine…

my base pattern
my base pattern


a few waves stitched: 2 threads per wave


20160413_174839
Silk and metallic thread combinations


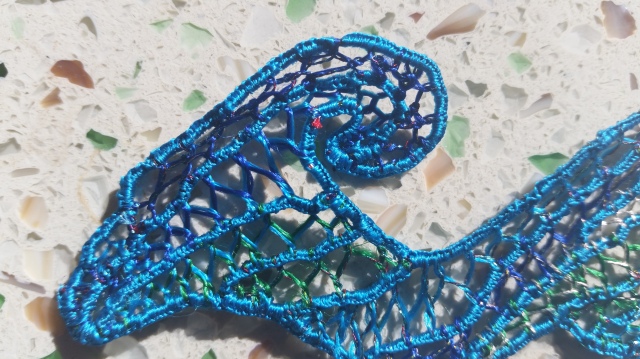
Finished product

20160420_083635


left side
left side


right side
right side


next to the pattern
next to the pattern

I’m really loving how this wave pattern came out matching my expectations for movement in thread. And now an artist friend has suggested that I abstract this pattern and go bigger…I’m hooked and thinking….how can one abstract a needlelace pattern…I have ideas….


Needle Lace…I’ve Been Inspired by an Artist

Recently I was fortunate enough to be able to purchase a piece from this amazing artist: Ágnes Herczeg. She does a form of needle lace that incorporates natural elements to create amazing works of art.

Hanging proudly on my wall! By Ágnes Herczeg
Hanging proudly on my wall! By Ágnes Herczeg (link to more of her works on her facebook page)

Her work really intrigues me, and even when I hold it in my hand, I can barely comprehend how the tiny stitches came together into such a beautiful form (I’m still admiring it under a magnifying glass – such detailed work!!).

Needle Lace and Me

So of course I had to look this up and figure out how a lay person might give it a try. I found this super cool tutorial that walked me through the BASICS of creating lace on paper. So I gave it a try.

20160406_232655
Finished product – lots of room for improvement but an interesting experiment. (silk floss on outside/ribs, cotton floss on veins)


In Progress Notes


Using the cordonnet stitch to attach the framework
Using the cordonnet stitch to attach the framework. I think next time I’ll use broader anchor stitches instead of stitching each cord separately (the anchor stitches didn’t come out easily)


Working the buttonhold stitch up the leaf
Working the buttonhole stitch up the leaf


Adding silk thread to the veins of the leaf
Adding silk thread to the veins of the leaf (boy did it take me a long time to figure out the direction of stitches on each vein to get the knot to line up…I think I got it…)

I’ll definitely create more patterns to mess around with (and I’ll probably “have to” buy more embroidery thread because my stash colors are boring).

Until then…

Here’s What’s Blooming in the Garden!

Squash flowers are so beautiful!!


Needle felting: by hand and by machine

I’m back to my regularly scheduled programming this week, returning to my day job, or what I like to refer to as “my new daily grind” (it’s definitely caffeinated). The night time blend still involves art du jour as possible, and tonight I have more stuff to share from my Art and Soul Retreat.

Turns out there are soooo many ways to felt beautiful things!! I talked earlier about my first wet-felted scarf and needle-felted penguin (see: felting).  I decided to felt some more penguins and I took a few pictures along the way.

Hand Needle Felting

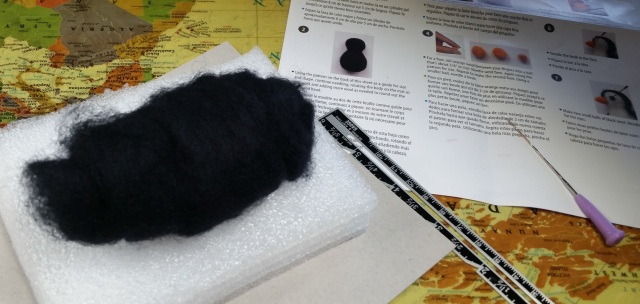
Penguin #2 started like this...just a black roll of roving.
Penguin #2 started like this…just a black coil of wool roving and that little purple-handled needle (of doom, if you’re not paying attention).


Magically (after much hand-punching) that black roll of roving turns into penguin base - ready for his mask and tummy cover.
Magically (after so very much hand-punching) that black coil of wool roving turns into a penguin base – ready for his mask and tummy cover (you can see First Penguin modeling spookily in the distance – he doesn’t move around much – good model).


TA-DA!  "Felted Penguins in Ice Plant"
TA-DA!
“Felted Penguins in Ice Plant”

They’re cute little buggers and I want to make more!

Machine Needle Felting

So this is where the learning got real. We used Bernina machines with felting foot attachments, and the activity looked something like this.

Now. The person in that video is a ninja expert and is sewing at the speed of light…in circles. These happen to be the two behaviors that lead me to break approximately five needles (I lost count, and there was a hand-held felting punch in the mix as well. Oh so much learning. I was warned…) So that video isn’t so much “me doing machine needle felting” as “don’t try this at home.”

But I tried it at the retreat, because the teachers encouraged it, and they were the pictures of patience as they changed my needles (and removed the needle pieces from my work…with pliers…they didn’t even snicker!). Here’s the lessons I learned about machine needle felting:

  • Start out with some big pieces on your base felt, to get the feel of the felting needles (small pieces can be hard to felt into your design at first – edges are hard to deal with)
  • Start out at a very slow speed
  • Don’t use materials that are too thick (needles break – start thin)
  • Edges are tricky – don’t let the felting needles push the material down into the stitching hole (I finally figured out a few ways to deal with this; trial and error can be “fun!”)

My First Experimental Pieces

One of the great things about this Art and Soul Retreat was the ability to experiment with lots of different media. In this machine needle felting class they had all these sewing machines set up with the needle felting attachments, and once the teacher shared the basic technique we were free to use the machines and her stash (as well as some sharing students’ stashes!) to experiment.

Many of the teacher’s designs involved covering the top of the base design completely with a white silk scarf and needle-felting it so that you could barely see the base material underneath. But I preferred to try that on only part of my design (I’m still working on the concept of “collage” and possibly covering up an original layer :). You’ll see the white silk scarf running vertically in the top right corner of the design – pulled apart with my fingers as I felted so that more of the fabrics behind could show through.

There’s some orange-dyed cheesecloth in here as well – that’s really fun to felt with! And more silk pieces running horizontally as I tried tacking other pieces in (the pink across the top is one of my favorites).

I'm working on layers here. The base felt was white, covered by pieces of cotton and velvet, then felted with strips of silk, then embellished with beads.
I’m working on layers here. The base felt was white, covered by pieces of cotton and velvet (bottom left corner in purple – my fave piece! I love how dimpled the velvet got with the felting), then felted on top with strips of silk, then embellished with beads.

After Lunch…

I tried something completely different.

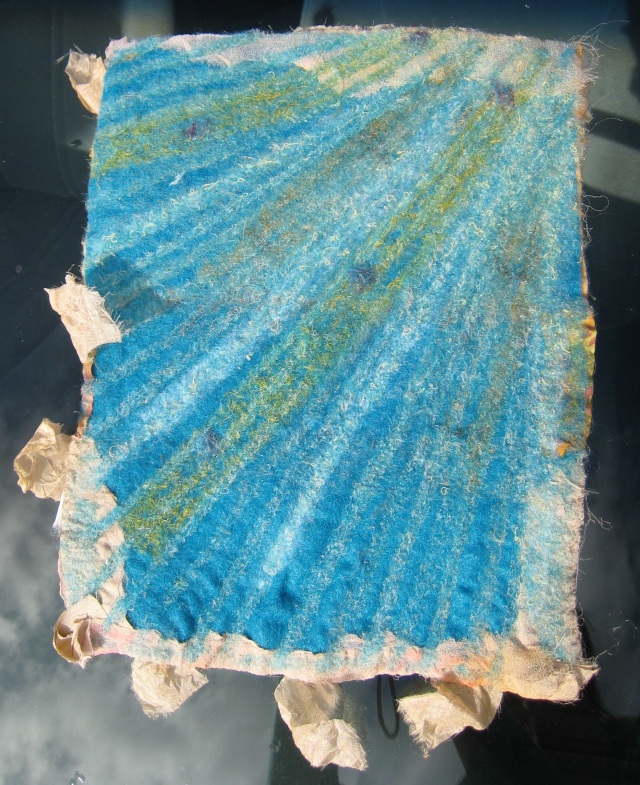
I started out with a blue piece of felt. (This is the end result turned upside down – you’ll see why in a second. Just remember…blue piece of felt…)

This is after felting - you can see where the yellow and white fabrics began to fuse with the felt and come through to the other side.
This is after felting – you can see where the yellow and white fabrics began to fuse with the felt and come through to the other side. This was actually a pleasant surprise I discovered after working for about 3 hours on the other side…


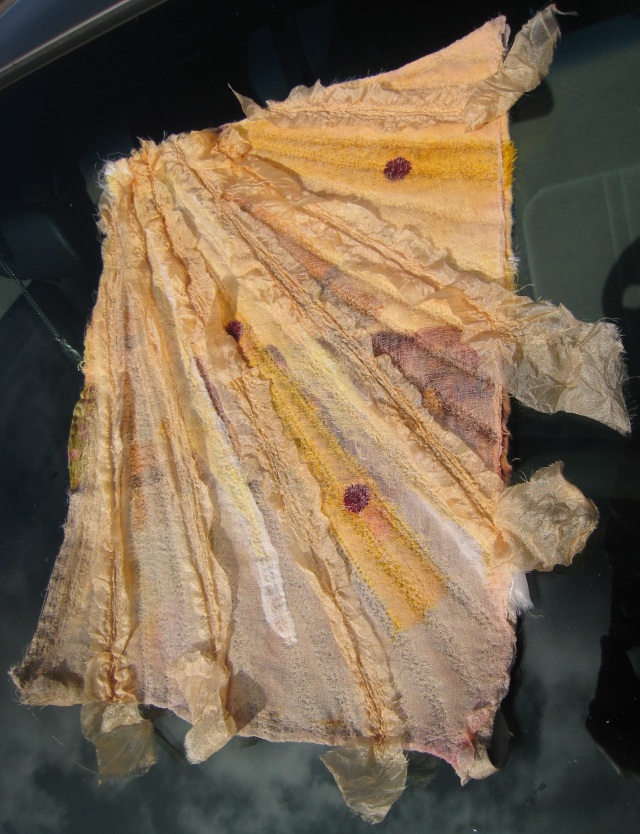
So many layers...base cotton material, strips of yellow and white (silk and cotton), layer of chiffon scarf over the whole thing, then ribbons of white silk felted on top
So many layers…base cotton material, strips of yellow and white (silk and cotton), layer of chiffon scarf over the whole thing, then ribbons of white silk felted on top. I spent extra felting time on the yellow strips and maroon circles, to bring them to the front.

I really was just messing around with the felting machine at this point – trying to attach different layers while maintaining a “sun-ray” design in the felting. I only felt-stitched along the sun ray lines (instead of up and down, side to side or the dreaded round-and-round) – which created that really fun back view in the end.

I like the frothy edges of these pieces, though I could just as easily cut these pieces up, zigzag stitch the edges and use them for smaller pieces.

After doing needle-felting by hand, I can definitely say that a sewing machine attachment is interesting to me. I can’t really create 3-dimensional shapes so easily with the machine (e.g. cute penguins), but I can create some very interesting background material in short order using scraps and hand-dyed fabrics.

I am considering that sewing machine attachment…
Have y’all done any felting you’d like to share? I’m new to this and very interested in what others are doing in this space.

Russian Spiral Jewelry…continued

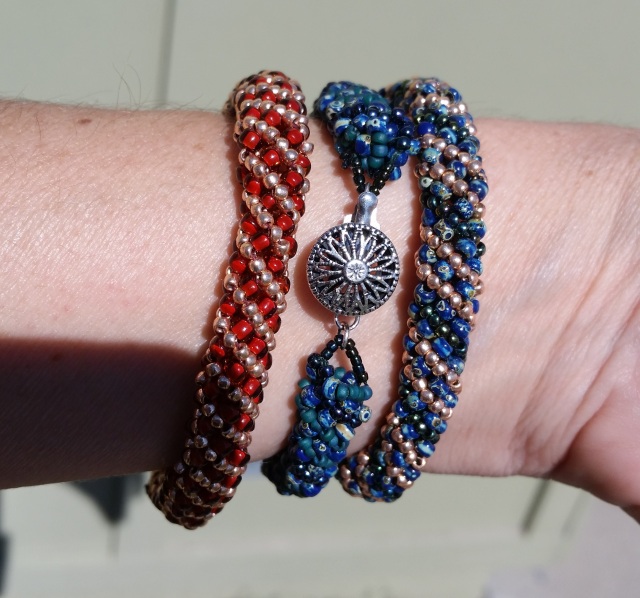
Today I continued to work on these patterns and figure out the kinks (e.g. switching threads, tying off, clasp vs. connection for a roll-off bracelet).

Happy with my progress…

bracelets2

It was fun seeing what different color combos created.

The clasp on the third bracelet (from left) didn’t work out so I’m going to have to re-work it. (It’s tricky to get the “v” effect from those tiny connector beads (accomplished in the middle bracelet). Still learning, but happy to be wearing the first two bracelets…learning…!

Tomorrow I’m taking a class to learn how to make a Flat Ribbon Kumihimo Bracelet…pictures to follow!

Hand-stitching a garment

So this is what I’ve really been up to in the past few days.

20160313_140809
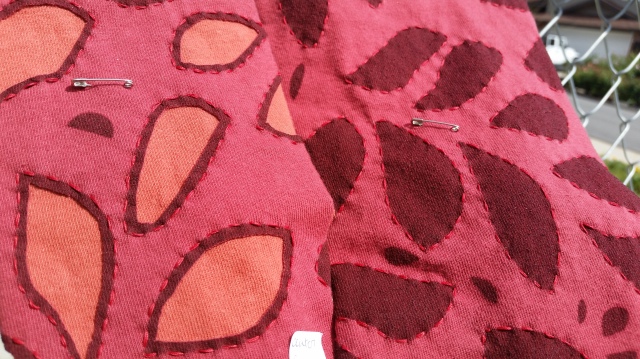
Alabama Chanin stitching – left side has been cut out and right side hasn’t


Chanin stitched corset pieces
Chanin stitched corset pieces (some are backwards so you can see the knots on each leaf)


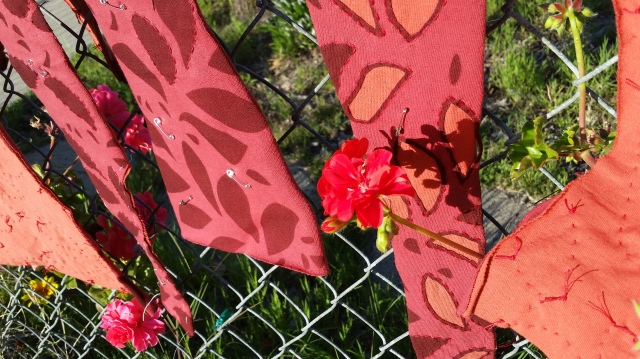
Geranium in the mix
Geranium in the mix

I bought some great beads a few days ago that I think will make great embellishments. I’ll keep you posted…