Crochet Beaded Bracelets

My friend Gina sent me a link about two years ago showing some crocheted bracelets with button closures – so cute! I figured out the pattern, found different sized buttons, crocheted about twenty bracelets in varying lengths (multi-wraps are fun!), used jewelry o-rings to attach charms midway and started handing them out to friends on my travels.

Oh, the charms – they fell off in legions – usually after a household chore like doing the dishes…or walking across a room. Sometimes even before I was done with the visit (In Kauai I actually asked for some pliers and replaced the gifted charm with one from my purse. It probably also fell off soon after I left. Mrgh!)

I have not mastered the fool-proof closure of o-rings (does this exist, beyond soldering?).

Alas, a design failure the internet did not prepare me for. Also, I’m not sure how much I want to talk about how hard it is to BUTTON your own wrap-around bracelet…

New rule: Jewelry should not be a reminder of loneliness, or dexterity challenges, or a cause of any stress whatsoever frankly (right?!). Wait ’til you see how I’ve solved this!!! (P.S. o-rings replaced by stitching…why didn’t I think of that…first?!)

Magical Magnet Closures

I attended a presentation today of the San Diego Bead Society and was inspired to think again about what kinds of trades I could make for my next art retreat. I put 2 + 2 + 2 together and came up with: crocheted bracelet with beads and magnetic closure.

20161008_165219crop
Size 11/0 beads, Lizbeth variegated thread, size 10, gold magnetic closure

A couple hours before this creation I spent time looking up patterns for beaded amulet pouches and such, thinking that would be my thing. Then I remembered what I already know how to do and how many supplies I already have on hand. And how time works.

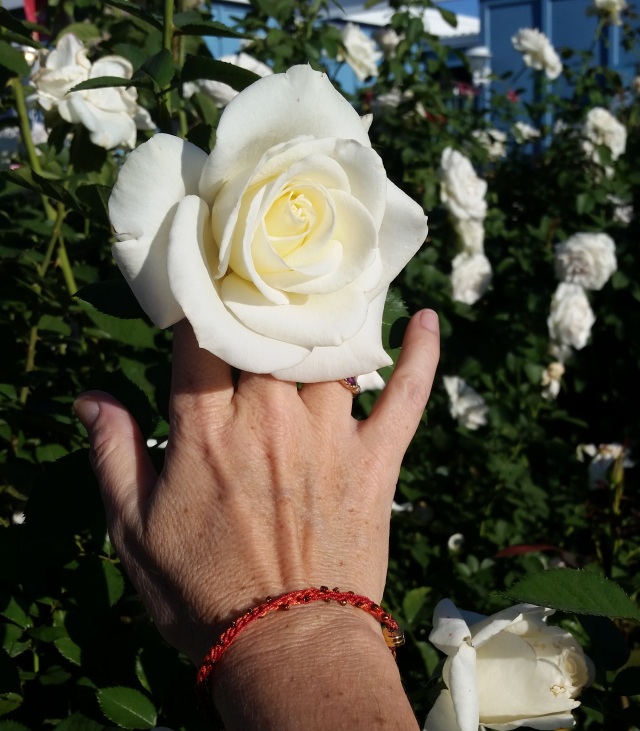
So I made the above prototype, using waxed nylon bead string to attach the magnetic ends to the crocheted piece, and also to thread the beads throughout. For the crocheters, I used a 2.25mm needle on Lizbeth size 10 thread. So far I’ve mapped a small bracelet (I have skinny wrists) like this:

  • Chain 60
  • Work a slip stitch in the 2nd chain from hook, and in all the rest to the end
  • Gauge: I worked these stitches fairly loose, to make way for the beads.

After that, I stitched the waxed bead string through a bead on one end and then worked a series of knots before attaching the magnet closure. Then I used the same waxed string to work my way back through the bracelet, attaching the beads on alternating sides.

20161008_165207crop

I aimed for every other stitch back and forth and it didn’t seem to need too much precision to attain a good effect.

I tried a couple of beading patterns (e.g. all on one side vs. alternating) and decided that going back and forth on the chain gave the best dynamic effect on the wrist.

20161008_165555crop

20161008_165555

I used Dritz Fray Check on the end knots and wrapped the ends next to the magnetic closures with extra stitches. We’ll see how it holds up in the next few weeks.

The Front and the Back


So far it’s hanging nicely with beads on all sides and the magnetic catch falling to the bottom of my wrist. I’ll keep wearing it and see how it holds up throughout the week.

Favorite Discovery

Magnetic connectors do the work for you! And they come in really fun shapes – like fish and turtles. The ones I found were too wide to work with my current skinny crochet chains but I have plans for those magnetic turtle and fish connectors…just you wait…


Spirograph Designs

It all started with something that came through one of my social media feeds today…Inspirograph…). Remember Spiro-Graph y’all? I played with the online app for a few minutes before remembering my very own Spiro-Graph set, in-house, from Turkey no less!

Despite the fact that I didn’t save my Spiro-Graph kit from the 70s, I have some tools on hand to relive the moment. When I was in Turkey 5 years ago I bought a mini-spirograph kit from a street vendor. I dug it out today and made some art with it.

20160827_141901
There’s two outer sizes and four cog sizes with 9 holes each…don’t do the math…your head might explode
20160827_141700
I used one marker (blue) in different cog holes…1, 2, 3, 4….
20160827_141632
Bigger wheel…
20160827_141628
Spiro-Graph Experiments

This made me think of Spin-Art, which is now apparently available for party rentals! Seriously?! Of course! I’ll be renting one soon for my next art party!

Thank you ’70’s!

Sewing Machine Special Stitches

I’m hoping to learn machine free-stitching techniques soon so I recently tried out all of my sewing machines stitches and “documented” my results.

20160821_163450_crop

I stitched all the numbers on the wheel then I started experimenting with the stitch length

20160821_163450
the final sampler

My First Machine Free Stitch

20160821_163444
I freehand sketched the main leaf pattern then used all my available thread to fill it in with special stitches (ran out of bobbins after the 3rd leaf…experiment ended for now…so lazy).


A Finished Product: Sewing Machine Finally Earns Its Keep

I needed to replace (or re-cover) the arm rests on the rocking chair in the living room (It’s the rocking chair from my now 20 year-old daughter’s baby years…needed a little refurbishing and we’re not getting rid of it…ever… o^O).

Luckily I bought this cool roll of paper from the place where I took my machine sewing classes (which is kind of shiny on one side…deli paper?) to cut out patterns.

20160822_173918

I measured the arm rests of the “Rocking Chair Needing New Arm Rests” and cut out at least four paper patterns before I got something that might resemble a finished product (with seams)…(cheap paper patterns are so helpful to avoid mistakes with material!)

20160822_174248
And here we go! I just need to secure it with a few anchor stitches to the arm rests! 

I inherited this material from a friend (it matches so great!!) and just sewed some seams onto each edge to get them ready for the upgrade. I dealt with the corner seams like an (untrained) champ and I now have a new home decor solution!

When I dreamed of owning a sewing machine I imagined myself sewing curtains for my home…so this seems pretty close to the dream (plus I’ve realized since then that buying curtains is way easier…unless the windows are a weird size…spoken from experience). #yaycustomwindows #rennovationsarefun

Garden Colors, Despite the Heat

We don’t have air conditioning and my extensive and highly scientific studies have shown that temperatures above 90 degrees Fahrenheit without AC make me a very grumpy and sleep-deprived crafter. These same studies have also shown that small dogs in this situation will move around the bed all night looking for the next cool spot and end up taking way more bed space than they are usually allotted (thus disturbing the sleeping humans on the same bed space). It’s a recipe for disaster and we’re all finding our way (mine involves a wind tunnel created with multiple standing and ceiling fans in the guest bedroom…did I mention my night sweats?).

So we’re having slightly more fun than the rest of the world that’s dealing right now with heat stroke (my family and friends in Texas are dealing with 100+ temperatures so I’ve extended a personal ban on my own complaining). The sluggishness does make me question my lizard roots…(I get so lethargic that the only thing missing is the lizard push-ups…most hilarious thing ever…if you’ve never seen it you should do a quick search…I’ll hold).

I’ve been posting more on social media than my blog (pics with few words are WAY easier!), so my summer life has been documented elsewhere. But no fear of missing out on my every sneeze! I’ve decided to capture a “best of” here to keep us all connected (ok, it’s based on nature and art rather than sneezes – lucky you).

Nature First: In the Garden

20160815_115709
We can finally grow tomatoes without the local wildlife eating (most of) them!


20160815_115632
Cape Honeysuckle blooms
20160802_095100
Plumeria in the front yard
20160815_115749
Often when these geraniums grow next to each other one of them creates a bloom with both color schemes in one blossom. I haven’t seen it yet this summer.

Geraniums remain my primary vote for IronMan of Flowers in So Cal. They bloom all year long here y’all, despite heat extremes and water constraints. It’s basically a weed here and I give/throw away runners all year long (poke it in the ground and you have a new geranium bed).

20160802_094909
This is a rose bush I rescued from my neighbor’s driveway under a “free” sign. She has a garden full of more than 200 types of roses (all with official name signs) and for some reason this one was being cycled out. It’s called a “Rosetti Rose” (for the curious). It’s the only  flower in my garden with its own pre-printed name tag.
20160726_191456
This wonder of nature landed on my rental car windshield when I was recently in Portland, Oregon.  What a cool way to be, huh?
20160808_105451crop
This is my pineapple experiment…

So this took years y’all. I planted three pineapple tops “Avocado-pit-style” and waited…and waited…and waited…and I’m still waiting on all but this beauty. I think 5 years might have passed while these guys sat in pots and got moved in and out of the direct sunlight (causing some lukewarm gardening discussions about placement and which should be moved where when…a lot of W questions were flung about). This is all in the shadow of a favorite previous neighbor who grew  multiple juicy and edible pineapples in pots just like this around his pool (one of these experiments came from his garden). Not sure what I’m doing differently and I can’t guarantee the above fruit will ever be edible. But we continue to try…

So that’s what’s happening in my corner these days. I’ve also been crocheting, drawing and experimenting with the special stitches on my sewing machine so stay tuned.

Happy crafting!

Stamping Christmas Cards (sorry it’s so early)

I’m happy to report that I’m working way ahead of schedule this year in the area of Christmas cards. Year before last I stitched some Christmas card beauties and, frankly, set the bar way too high for myself, as witnessed by last year when I barely wrote replies to those industrious souls who kept us on their list. It’s a tough grind that one wants to keep going right? (Yes we do – it’s worth it – handwritten snail mail rocks!). In some cases it’s our only reachout to some of our favorite people! And once my progeny moved out of the house the ready-made family photo was no longer available as card material, so I had to come up with something (dog photos? Scruffy is pretty Scruffy-licious!)

Draw a Few/Carve Once – Stamp Lots

One of the things I love about rubber stamp carving is that it allows me to easily share a creative idea across multiple media. I’ve just experimented with paper here but I can see some fun to be had in stamping material with these (handmade stamped canvas gift bags?).

20160718_184842
I sketched so many trees before I figured this one out! I like the way it comes out after Sharpie embellishments.
20160718_184349
So many things to love…

The drawing for the tree stamp is partially showing top right, so that’s fun to see in it’s original state (the candy cane and heart you’ll see in a minute). Then the poinsettia, which I stamped in a darker red to accentuate the spaces, and also in a lighter red so I could marker-outline the edges. Right now I can’t decide which I like more. Let’s make 10 of each!

I think those are the winners in this year’s contest for “Which Rubber Stamp Carvings Will Make This Year’s Christmas Cards” (the acronym isn’t worth it…this contest may never happen again).

Runners Up

Candy canes big and small deserve air time, and I’m here to make sure that happens.

20160718_184801
The heart candy canes are my own design (though I doubt I’m the first to think of it so I won’t be seeking a patent) and I think they’ll look great on the sealed back of a Christmas/Valentine’s Day card envelope.

The larger candy cane stands alone as a tribute to lazy rubber stamp carving. It was easy, so I did it, and I can’t imagine where I’ll use it. Such is the way with rubber stamp carving sometimes. (Good news: I used a scrap piece from another stamp to make it, so no full rubber stamp lives were lost in the making of this candy cane stamp.) Phew! Thank you for your concern.

Sending love and thoughts of light. What art are you working on today?


Zentangle: Is It Cheaper Than Therapy?

I’ve seen the word “zentangle” come up in “adult coloring” searches and have been thinking about it for awhile. This weekend I decided to do an image search on “zentangle designs” and I dove right into the vat of kool-aid. Now I’m a zentangle addict with some fine-tip Stabilo colored pens on order (due to arrive any day now, but who’s counting. I am. That’s who’s counting.)

It All Started with Chisel Tip Sharpies and a Kleenex Box

I *think* I bought this set of Sharpies for a banner that never got made (how else does one find oneself in ownership of a full rainbow set of large chisel tip Sharpies?).

Then there was the Kleenex box in my office that has white flower designs. I had a few Sharpies in my office pen holder and lots of time on my hands listening in on business meetings…so doodling began. Along the way I realized that these big Sharpie markers had a calligraphic edge so they got carted out to my office for further doodling (pictures forthcoming, once the masterpieces are complete…of course. Reminder: There are 6 sides to a Kleenex-box-work-of-art. Have patience people. Reminder to Self: This Kleenex box “work of art” is destined for the Recycle Bin. Art Everywhere!)

What Would These Sharpies Look Like in My Art Journal?

My mom is my first official Art Supporter and she enrolled me once in a brief calligraphy class that involved “nibs” and “ink” and some really cool lettering (I was probably 12 yrs old). As soon as I started messing with these chisel tip markers it all started coming back…

First I tried practicing the calligraphic strokes I remembered
First I tried practicing the calligraphic strokes I remembered, plus some general mark-making.

As you can see on the next page I started one of those “zentangle” designs we used to make in kindergarten (Instructions: scribble a big set of connecting loops then color the inside. The beginning of many refrigerator-art-masterpieces…not to mention adding wax paper, crayon shavings and an iron.  We were all artists in kindergarten and we still are!!)

Here’s another angle of the tangle (ok that was fun):

Crayons graduated to Sharpies...and more ideas are generated...
Crayons graduated to Sharpies…and more ideas are generated. I barely got done with the Sharpies before I was off and running in my sketch book with some fine-tip markers.


Taking It to the Image Search

Once I realized the similarity between our childhood scribble homework from kindergarten and the “official art form known as zentangle” I was off and running.

My favorite image search engine provided helpful filters (in lovely rainbow colors) to show me what everyone is up to in the zentangle world (it’s a whole world y’all). I saw “hand” and “step by step” and started making some marks.

Hand Patterns in Zentangle

When I saw what the world is doing with handprints and zentangle I had to get me some of that. So I made the old turkey beginning handprint with a pencil and started doodling.

Here' the first one I did of my hand using a couple of super fine black sharpies.
Here’ the first one I did of my hand using a couple of super fine black sharpies.


Here's my mom's hand with some different designs.
Here’s my mom’s hand with some different designs. I love the 3D designs and keep trying to emulate them.


The railroad tracks were the first design on this handprint (hard act to follow).
The railroad tracks were the first design on this hand print (hard act to follow, but easy to learn from the free online tutorial graphic). The “tendon design” on the thumb turned out pretty cool. The middle finger is a 3D pattern gone wrong (and saved at the last minute :).


And then I got hold of my daughter's Stabilo point 88 color markers...
And then I got hold of my daughter’s Stabilo point 88 color markers…Oh Happy Day!


Another "selfie" with colors
Another “selfie-hand” with colors

Shortly afterwards my daughter packed up her supplies/belongings for college and I was left to my own devices. I promptly ordered another set of markers similar to hers and am awaiting arrival…

I tried to use my “in-house” fine-tips to create more color tangles but they dried up after a few marks. I couldn’t wait for my ordered markers to arrive (Impatience IS  my middle name) so I went to my local craft store and dropped $5 on a sale set of fine-tip markers that bled more than expected in my sketchbook but still turned out some fun results.

Bigger markers - same fun
Bigger markers – same fun

Check out zentangle designs online y’all! It’s relaxing, fun and quick to spur new original designs. (I think these could make cool cards too! And rubber carving options – oh my!).

Which is my favorite? It’s a Tie!

My mom sent me a great text recently: “I have access to lots of ties – want some for your crafts?” You betcha and yes ma’am!

So here’s some of the lovelies she picked out for me. What should I do with them?!

20160622_181137
there’s art, upholstery, book covers…the possibilities are endless!
20160622_181120
crowns and a feather, we’re spanning some decades here
20160622_181028
the white and tan beauty in the middle defies tie-dom with its texture and lack of definitive creases – I think maybe it’s aiming toward sash-dom…on a party dress…

The purple one to the right of center might be my favorite (after I sing “Sailing” by Christopher Cross and “Lime in the Coconut” in honor of pineapples everywhere…wait, there’s no pineapple involved in that song?! P.S. I don’t want to talk about watermelon right now…unless you can quote a song that mentions it).

These ties are pure gold and all my thanks go to my mom, who took the time to pick them out and mail them to me. I can’t imagine what I’ll make with these beauties…any ideas?

Bringing It All Together: I’m Making Cards!

I had to wait awhile to post pictures of this so my daughter wouldn’t see her birthday card ahead of time. I’m having a lot of fun using my mono prints and stamps to make impromptu cards (anyone else out there boycotting purchased greeting cards and all they stand for? UNITE!).

So here’s what I made to celebrate my daughter’s offspringing…

638cover
I added beads to the embroidery then used double-sided tape to attach it to a piece of scrapbooking paper.
20160614_174855
Then I glued a mono-printed page to the inside top and stitched my needle lace to the bottom (I like how the cut threads added to the wave motion).
20160527_150704
close-up of the mono print
20160614_174845
close-up of the attached needle lace
20160527_150720
Back of the card – I like how the blue silk stitches seem to interact with the gold grassy marks.

I really enjoyed adding beads to my embroidered patterns and I suspect that technique might make another appearance. I especially enjoyed finding a use for my needle lace pattern AND avoiding the greeting card industry. It’s evil y’all. Buy card stock on sale and draw a picture. Your loved ones will love it even more than that $7 card that sings.

P.S. I used my mono prints recently to create a thank you card (plus two bonus bookmarks I included…that could be used to create two new cards…). It’s the gift that keeps on giving, as well as a gift that’s fun to give. I highly recommend purchasing a cheap gelli-plate and going to town. It’s kind of a “no wrong answers” situation: even your least favorite print can be turned into your favorite bookmark.

Embroidering My Stamps on Cloth

I’ve been having a lot of fun carving my own stamps since my class with Jane LaFazio. I decided to make a stamp from the wave pattern I used for my last needle lace design. I’m thrilled with the results.

The carved stamp is on top of the needle lace pattern it came from. Ink stamps and needle lace results surround.
The carved stamp is on top of the needle lace pattern it came from (you can see the needle holes if you look closely). Ink stamps and needle lace results surround.

I’m digging the rubber stamp carved “chatter” inside the waves – I tried to let this flow while I was carving instead of doing a full excavation. (There were so many unintended puns in there that my fingers got sparked off the keyboard for a second. Unintended y’all, I promise.)

Close-up on the wave needle lace. I love the shadows at the top of the waves. I was really going for motion with the different thread choices.
Close-up on the wave needle lace. I love the shadows at the top of the waves. They add to the motion of the ocean (couldn’t resist – I’ll try to stop).

I especially like seeing the end products next to the pattern. So different when it’s transferred to ink on page vs. needle laced. If you’re digging that, wait til you see what’s next!

This is my first embroidered stamped pattern...I learned a lot.
This is my first embroidered stamped pattern…I learned a lot.
close-up on the shiny thread...and spooky eye
close-up on the shiny thread…and spooky eye

So I really like metallic and silk thread…and they’re very finicky. I think Seahorse Dude is kind of gnarly as a result, which makes sense when you think about his time underwater in the ocean…moving on…

WIP
WIP – loving the direction of the daisy chain stitches
Finished product - yay metallic thread!
Finished product – yay metallic thread!
Turtle gets a close-up...he's on the move!
Turtle gets a close-up…he’s on the move!

Earlier today…I was getting a smog-check on my car next to a craft store…so I spent my time wisely.

Super cool frame idea (way too much $$ for purchase...even with a coupon)
Super cool frame idea (way too much $$ for purchase…even with a coupon)
And a close-up on our favorite wave (pre-embroidery!)
And a close-up on our favorite wave (pre-embroidery and in a borrowed frame!)

It’s fun to see my rubber stamp patterns come to life in stitching!

Crafting/Sailing Away…

WIP: Crochet Blocking

In my free time (ha!) I’m working on the Crochet Along (CAL) I mentioned earlier. It’s a fun color palette, soft yarn, and a supreme challenge working through a pattern from a new crocheter every week (we get a new pattern each Wednesday with the plan to work up four squares – I’m two weeks behind everyone else so far – so, right on target!).

It’s the first time I’ve taken crochet blocking seriously…though there was that crazy crochet snowflake season when I realized they would only work as possible presents/snowflakes when they were blocked and starched. It involved the stove, a bulls-eye target-looking printout from the internet, one trillion pins and some unfortunate craft bead dye-bleeding (which looked as tragic as it sounds – those snowflakes are in the pile called “Never Throw It Away Because You Might Want to Use it Some Day”).

So that was traumatic and I vowed to never block again. Except on week two of the CAL I was turning out some fun trapezoid shapes that didn’t seem destined for any afghan pattern I have ever seen (or would want to crochet), so I decided to block.

Here's what everyone looks like all blocked up (they clean up nice!).
Here’s what everyone looks like all blocked up (they clean up nice!).

Here’s what the unblocked rascals look like:

You can see the sideways madness that drove me to blocking.
You can see the sideways madness that drove me to blocking. Upper left square is missing the border stitch, making him the first cousin to the right upper square. Both of which are aspiring to the stolid nature of bottom left and right squares…we can do it…with some water and pins!

NOTE: It’s taking longer than I thought for those squares to dry…or maybe I need better blocking techniques. I’m expecting company soon so I unpinned those blue squares this morning to try to clear the area…and they quickly started shrinking right up. Hmmm…. re-pinned those suckers post-haste and am considering heat treatment. Nah – too extreme. Will unpin again soon and hope the gods of crochet connection will solve this problem for me.

Sewing on…